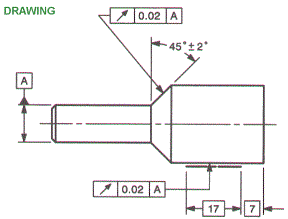
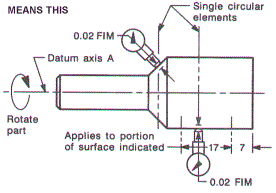
CIRCULAR RUNOUT |

|
|
At any measuring position, each circular element of these surfaces must be within the specified runout tolerance (0.02 mm FIM) when the part is rotated 360¤ about the datum axis with the indicator fixed in a position normal to the true geometric shape. |

|